These geometric lanterns are perfect for lantern walks and celebrating the Festival of Compassion. They are a little tricky, so may be better suited for older children, grade 4 and up. Materials
Step 1 Start by painting an 11″x14″ wet-on-wet watercolour painting with a basic colour wash or use a previously painted watercolour painting. Step 2 Print the template and cut out the preferred pentagon size you want to make. Trace the template onto the backside of your watercolour paper 11 times. Include the lines that are at the halfway point of each side. Then cut our all 11 pentagons. Step 3 Fold each point of each pentagon using the lines at the halfway mark along each side as guides. Continue until all the points are folded down on all 11 pentagons. Step 4 Make two rows of five pentagons and set the 11th pentagon aside to be used later as the bottom of the lantern. Open the flaps on the side where the pentagons are touching and glue the flap from the pentagon on one side to the inside of the next pentagon. Turn the pentagon over and glue the flap on the outside down. Make sure to align the creases of the folds. Step 5 Join the ends together by gluing both sides of the end flaps and pressing firmly. Now you have two "bowls." And ours magically turned a different colour at this step, as you can see. There is always magic in the air ;-) Step 6 Attach the "bowls" together by placing the wide ends of the bowls on top of one another. Continue to glue all the flaps together on both sides of each flap until you have a sphere. This step is tricky and difficult to photograph, but it's very intuitive, and we have every faith you can figure it out. Step 7 Glue the final hexagon to one end of your sphere. This is now the base of your lantern. Step 8 Glue down the flaps around the inside edge of the opening of your lantern. Step 9 Place a candle inside and bask in the warm glow of your hard work. If you so desire, you can tie a string at the top to be used as a handle. Optional step After completing your lantern, you can rub a thin layer of olive oil on the outside. This will make your already gorgeous lanterns translucent, which is a neat effect. You did it! Now, you have a stunning geometric work of art to display on your winter nature table or to use in a lantern walk. In this time of turning inward, may you find your light shining brightly and remember that even the tiniest flame can dispel the darkness. Through the darkness, we shall go With our candles all aglow Hearts grow warm, Our way grows bright As we journey through the night.
0 Comments
What is a Nature Table and why do you see them in most Waldorf classrooms and in the homes of families who value Waldorf education? What purpose do they serve and why should you create one?
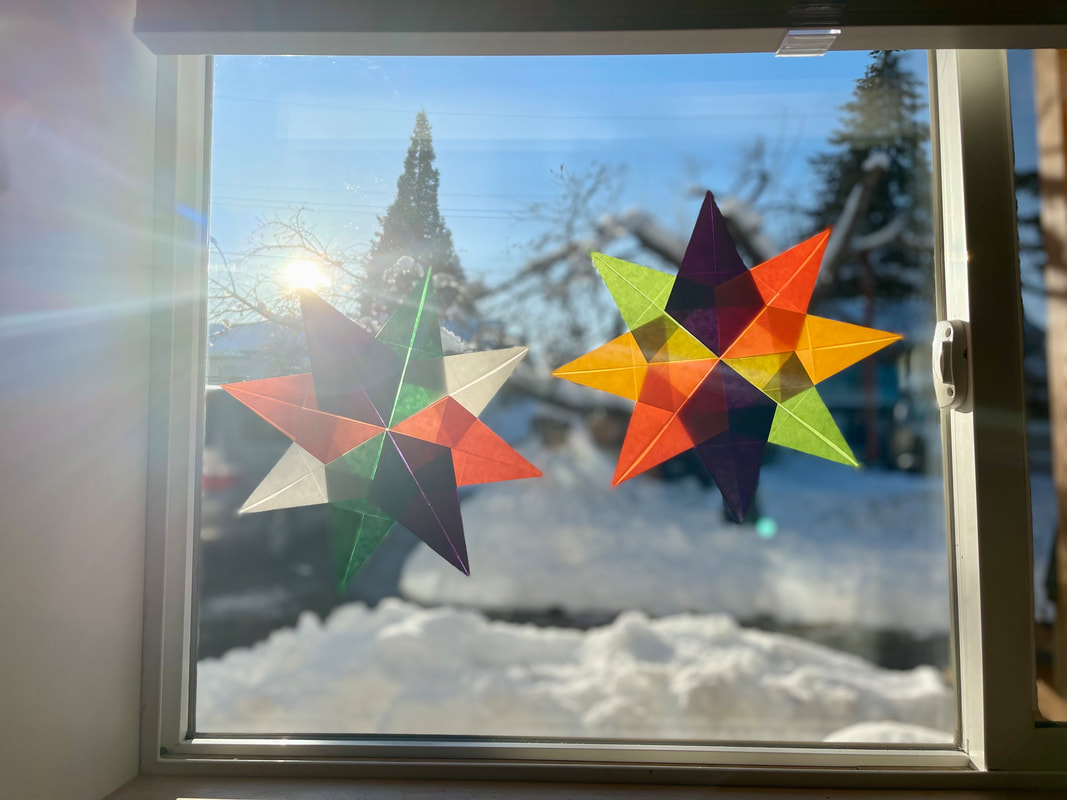
These beautiful eight-pointed stars are easy to make and it's fun to decorate your windows with them during the winter months. What You Need:
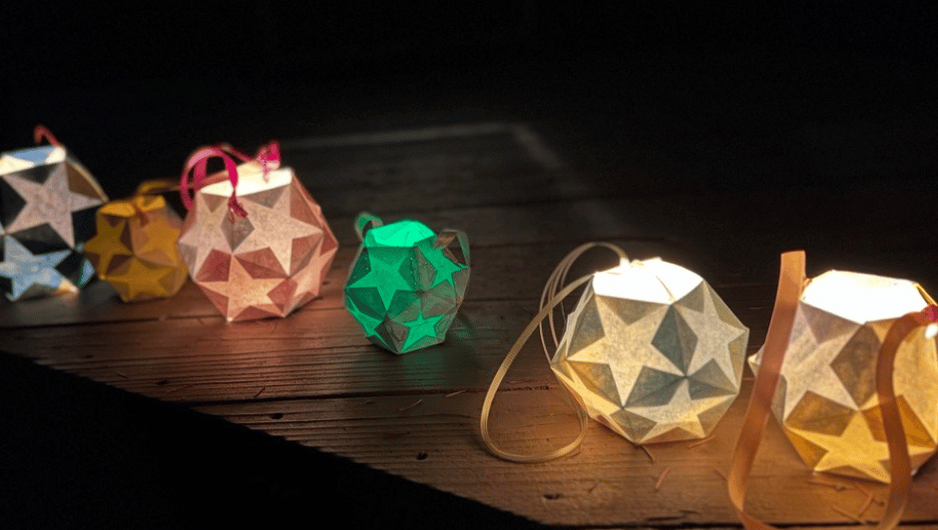
How to Make:
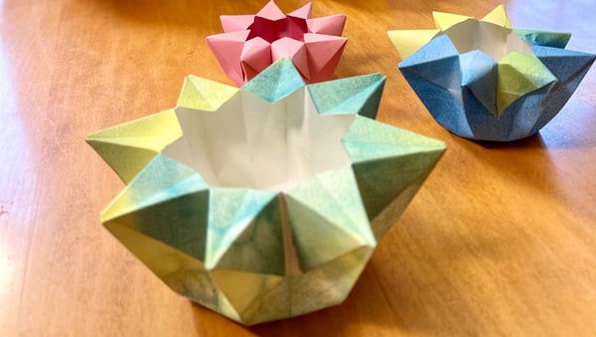
Learn how to make beautiful paper star lanterns. These are perfect for your winter nature tables, for a lantern walk, or to decorate your advent spirals. They are also an excellent way to use up watercolour paintings. You can even coat the paper in olive oil and let it dry before folding it into a lantern. The oiled paper creates a beautiful translucent effect when lit up. Remember to never leave your candle unattended. Things You'll Need
How to Make Your LanternFelted Artwork by Mimi Hirsch The Meaning of Martinmas
Throughout the year, Waldorf Education celebrates festivals to connect with the cycle of nature, establish a yearly rhythm for the children, and strengthen the community. The Festival of Compassion (Martinmas) is celebrated around November 11, between Michaelmas - the Festival of Courage's fiery out-breath and the winter holidays' deep in-breath. Universally, it honours St. Martin's story, patron saint of beggars and outcasts, known for his gentleness and ability to bring warmth and light to those in need. He is best known for his kindness toward a poor beggar freezing outside. Martin used his sword to cut his cloak in two and gave one half to the beggar. This act of compassion, which gave the beggar warmth and hope, is why this festival is also called the Festival of Compassion. Waldorf Education celebrates this festival by making lanterns with the children and gathering for an evening Lantern Walk. Teaching cursive is fun, easy, and has great pay-off. Cursive can be especially supportive to those that struggle with forming print, reversing letters, eye-tracking, or reading. Not convinced it’s worth it? Check out these articles that explain some of the benefits of teaching cursive.
Literacy Benefits: Scholastic.com Biological and Psychological Benefits: PsychologyToday.com Daily Wonder recommends teaching cursive as soon as grade two, when your child knows all the letters, knows their sounds, and is beginning to understand the rules for encoding (spelling). We recommend that the archetypal forms are brought in order of difficulty rather than letter by letter. Below is a step-by-step guide to bringing the forms that are the basis for the letters. Remember, any new skill needs daily practice to become a capacity. We recommend that once you have brought all the forms/letters that cursive then becomes your expectation for all written work. It can take a whole year to become a natural at cursive but just think of all the brain pathways you will create and strengthen in your child, what a gift |
BlogExplore schedules, rhythms & routines, songs, music, festivals, free play, meals, projects & more to support your homeschooling program.Categories
All
Archives
November 2023
|
You might be wondering... |
Visit us on Teachers Pay Teachers© COPYRIGHT 2020. ALL RIGHTS RESERVED
Serving your worldwide educational needs from Comox Valley, BC, Canada. |